I have always allowed some degree of flexible seating in my classrooms. If I had a student who liked to stand, I would raise their desk, put them to the side or back and let them stand. If I had students who liked to work on the floor, I said "go for it!". Like so many things that I have always just instinctively done, suddenly it's everywhere, and it has a name: FLEXIBLE SEATING!
The Why:
Current "best practices" are all about giving students choice. I embrace them all! Choice in what they are working on (Daily 5, Guided Math), choice in their projects (Genius Hour, Book reviews), choice in what they spend their daily "On the Ball" Bucks on in the classroom. Making good choices is an important skill and one that kids need to practice to be good at! So why should where they sit (or stand) be any different? I know that even as an adult, when I am at a conference or workshop and am expected to sit in a chair and listen for hours, I turn into that "disruptive, tuned-out fidgety" kid that drives every teacher crazy!
The How:
Before I attempted to make Flexible Seating in my classroom even more of a thing, I did some research. Mainly looking at blogs of teachers I admire and seeing how their classrooms are set up. When I made my Crate Seats this summer, I took a lot of info from Tammy over at Literacy Loves Company, and she has so much amazing stuff! I loved the way she got her class involved in the decision making process when it came time to tackle Flexible Seating! So following her lead, and the kids and I sat down to talk about it. We discussed the difference between places that are just fun, and places where they feel they could actually work. One of the ideas that came up is that many of them wanted a way to have some privacy when they were working. That surprised me, as they have never asked for or tried to find privacy... but we talked about it, and they idea of foam board privacy walls was put on the chart. We added all the spaces they like to work, and then they each got two sticky notes to add to the chart.
This was when everyone voted for privacy walls,
So I took it off the list, saying we could get a class set,
and they changed their votes.
After the second vote. We don't actually HAVE a couch,
but now I will try to find one. On the CHEAP!
I found the results very interesting! Not one kid voted for a regular table and chairs, and that is one thing we actually do have in our room. This explains why it ends up just being a dumping ground for me! lol I was also interested that 5 kids (that's almost 1/3 of the class) voted to just keep using their student desk like normal. The "low table with pillows" got only two votes the first time round, but then got the most the second time! There may have been some peer pressure involved here, but it is an easy one to try, as I have a table that lowers, and some fundraising money to buy pillows. It's a start!
It didn't happen as soon as I wanted, but I finally posted my classroom pics! I made a page for it, so it is easily accessible, and so that I can adjust it as I change things in my space. Check it out HERE!
I don't like shopping. I never have. I am a plus-sized girl, so here in Canada, that means I have the option of about three stores to buy clothes. I kept seeing posts all over the place about various subscription boxes, and mainly I just ignored them. Then my cousin was telling me about the subscription box he gets (Loot Crate), and how the best part of his crates is the clothes. Huh... clothes? I didn't know I could get clothes. You mean I wouldn't have to shop, or even know what stores to order online from? I like the sound of that! So I looked up what boxes are Canadian, because there is no way I would be willing to pay the ridiculous exchange rate for a US based box. This lead me to an excellent website called Canadian Subscription Box Addict! Jill from Vancouver has a whole list of all the main subscription boxes, and blogs about the many she has ordered! The best part for me is that she says which boxes are Canadian. So amazingly helpful!
That's where I found the link to Frock Box!
Use the code 15PLEASE for 15% off your first month!
Basically, Frock Box has people (actual people) who choose clothes for me based on the profile I create. To start, I choose which box I want. There are three options:
Frock Box Favourites ($24.95/month Free shipping) - you receive 5 pieces of clothing. Items are individually priced between $34-$69. You keep what you love, and only pay for those items. The original $24.95 is subtracted from the cost of what you chose to keep. The things you don't want, you simply put back into the bag with the pre-paid postage sticker and drop it back in the mail before the due date. So simple!
Frock Box Gold ($49.95 plus $9.95 shipping) - you receive one complete outfit each month for that cost. Done and done. Usually includes a top/bottom, dress, or top/cardigan plus a piece of jewelry to complement the outfit.
Frock Box Jewel ($29.95 plus $3 shipping) - you receive one piece of handmade jewelry from a Canadian Designer each month.
I chose Frock Box Favourites, because I like to be able to try on clothes before I buy them. Just because it is technically "my size" doesn't mean it fits well. I went through the sign-up process, which was super easy! It asks for your hair colour, sizes (height, weight, shirt size, pant size, bra size), profession, and birthday. Then it shows you a few outfits and you choose the ones you like. I do feel like a few more options on this page would be helpful. Next you choose what types of items you would like to receive. I chose tanks, shirts, pants, dresses, skirts, purses and jackets, and said I don't want shorts, shoes, hats, sunglasses, jewelry, sweaters or swimwear. It asks you what kinds of things you do on the weekend, but again, only gave 5 options. Then it asks if you want to "play it safe", "in the middle", or "trendier the better". I chose the last one. Go big or go home! Last it gives you space to type any other information you want your stylist to know. This is where I told her I am a teacher but don't want to look like one! I told her what the dress code requirements are at my work, because I don't want anything I can't wear regularly. I also attached a link to my fashion Pinterest page so they could look at what I like. That's it! Easy. Now... the waiting...
My August 2016 box came mid-month, and I was so excited to check it out!
In the bag (not actually a box, but doesn't need to be. This is less wasteful!) there were the five pieces of clothing, the invoice telling me the cost of everything, and a card asking me to enter a contest by posting a pic of me wearing the clothes on Instagram, and letting me know who my stylist is. My stylist is Liz. Thanks Liz!
Coral Lace Neckline Top - $39
This was the first thing I noticed when I opened my bag, and I immediately loved the colour! The fabric is thin and soft, and needs a cami or tank under to smooth out bra lines, but other than that, I loved it! I got LOTS of compliments on the colour the first time I wore it too! Yay!
KEEP!
Purple Grandpa Cardi - $49
I like the colour, but I don't care for things with buttons because on me they always gape when I do them up. Undone, I don't mind the cardi, and I might wear it... maybe.
RETURN (although with the sale I kept it) *see below
Shop the Trends Black Blazer - $54
The fabric is a bit rough, but it works for a blazer. I've never really been a "blazer person", because I get too hot normally. But this fabric is fairly breathable, so I think I would be cool enough in it. I liked it both undone, and with a broach to clip it closed (I only wish it had a button to close it, and I might just sew one on).
KEEP
Denim Shorts - $39
Now, I could have sworn I said "no shorts" on my profile. I can't wear them to work, so there is no point in having them. They were nice enough shorts, but I couldn't even pull them up past my knees. I am a size 16/18 in pants, and these weren't even CLOSE to that (even though the tag says they are). I don't recognize the brand but I think it may have been UK sizing?
RETURN
"Blessed" Sharkbite Tank Top - $39
This was my favourite item in the bunch! Soft and flowy, it fits nice, looks good, and with something over top, I could wear it to work.
KEEP!
Note: they had a Anniversary Sale, where I could keep everything for $99. This was cheaper than just keeping the three things I wanted to keep. So, I marked the ones above that I would have returned, but this month I kept them all. The shorts I will donate to my local Thrift store.
All in all, I was happy with my first month! If there is even one thing per month that I love, it would be totally worth it to me! Don't forget to use the code 15PLEASE if you decide to try it!
Storage is always an issue, or at least it has been in the school where I work. We have one tiny storage room in the school, but we aren't allowed to put any of our own stuff in there. My classroom itself has only a couple shelves and cupboards, but that is mainly used for stuff I use regularly. For years I put fabric around tables like table skirts, and stored all the extra boxes under them. It was a waste of space, and didn't really look good.
Last year, I bought a cube storage unit second hand for $100. It stores all the supplies for our science centres, my seasonal decorations, extra school supplies for my kiddos, novel study units, headphones for computers, extra letters and other bulletin board stuff, and much more! Best of all, it looks good! The whole thing even sits in front of a bulletin board at the back of my room, so that's one less I have to decorate! Win win!
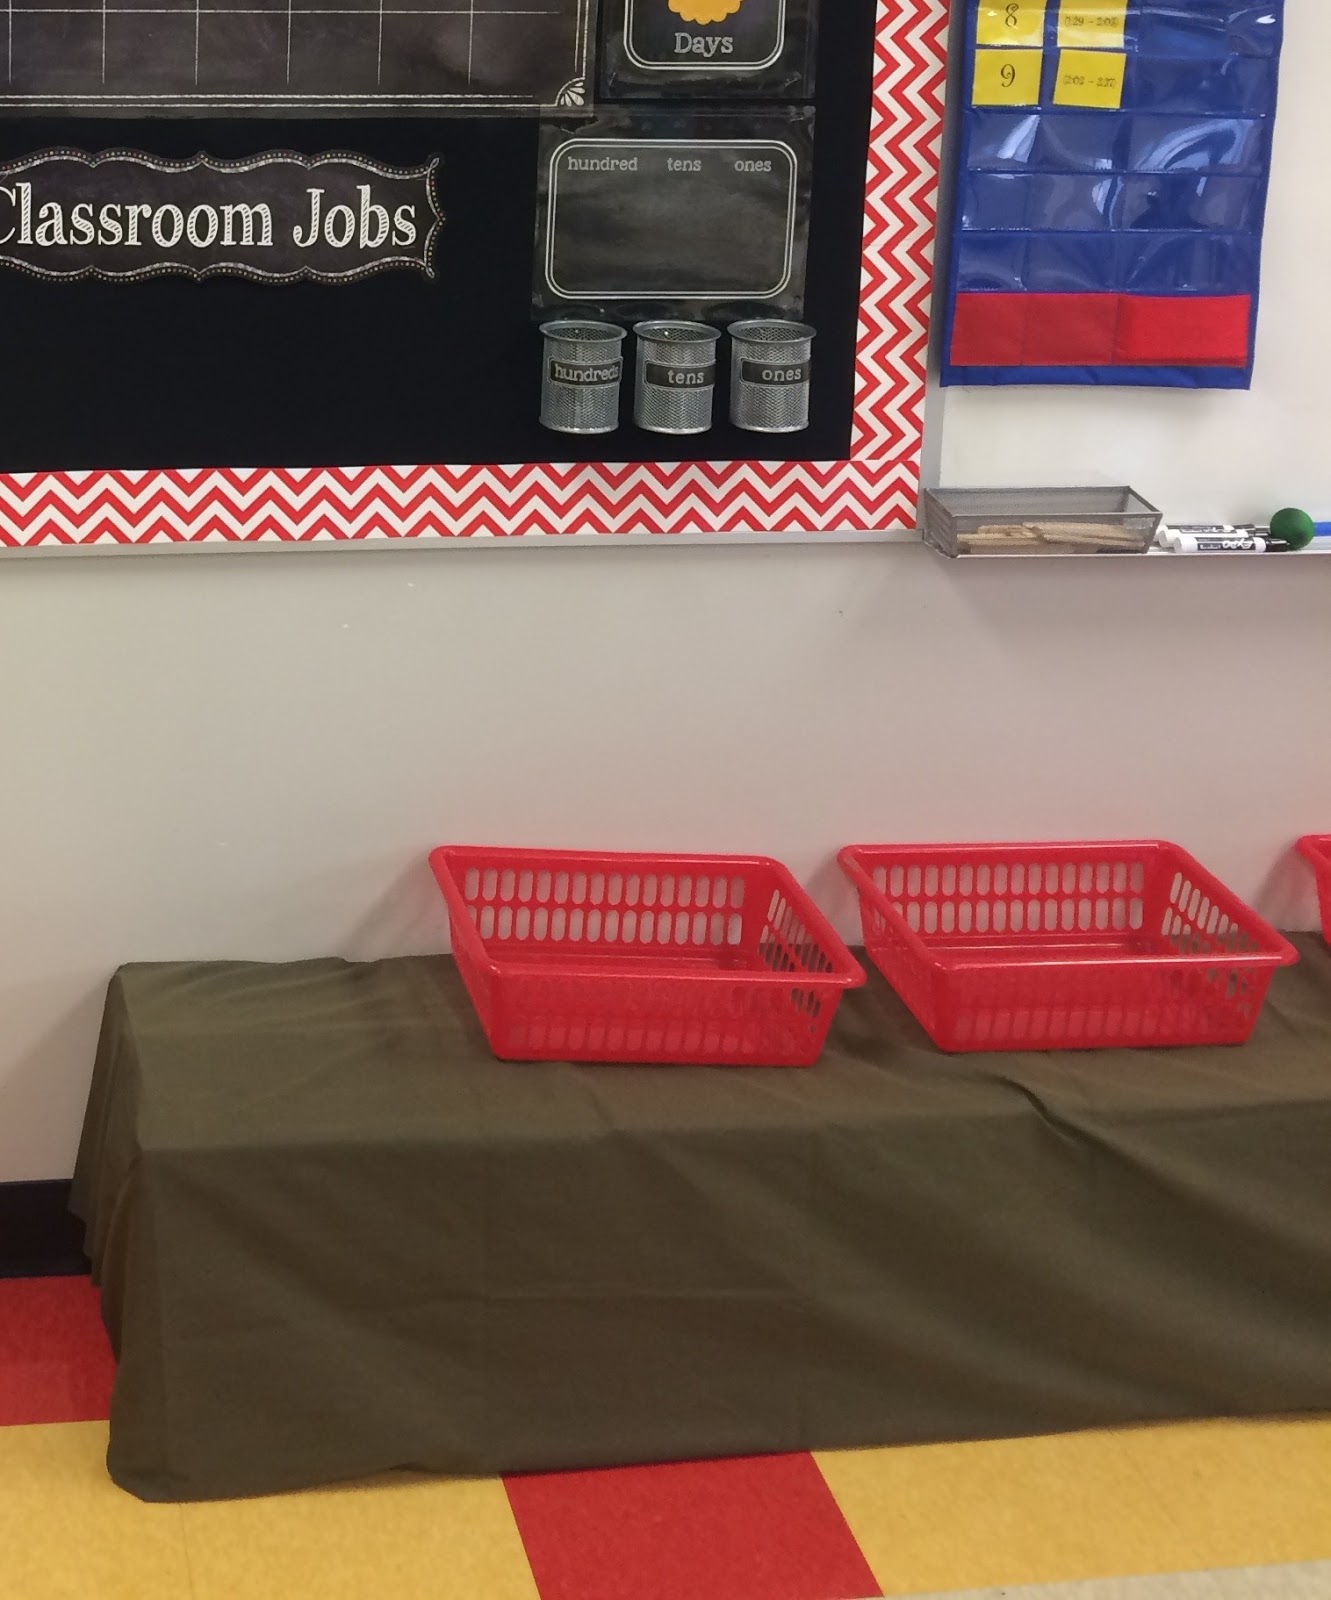
But I still had 7 U-Haul boxes full of my Grade 6 resources and books. Again, I came up with an ingenious (if I do say so myself) plan, and made the boxes into a shelf along my front wall, covered them with fabric, and put paper bins all along them for student notebooks, extra paper, and things like that. Perfect! Until the first time I needed to get something out of one of the boxes, but couldn’t without taking apart my whole shelf. Not such a great plan after all.
This is the temporary version I threw together this year until my crates were ready.
Plus, the kids always like to sit around the room when they are working, and would often sit on the boxes. Over last year, many of them broke or caved in.
There is "talk" all over teaching blogs lately about “Flexible Seating”, which is something I have always done. I had “standing desks” 12 years ago when I first started teaching, but I didn’t call them that. I just had some kids who preferred to stand, so I raised their desks up. Kids in my class have always chosen tables or desks or carpeted floor… wherever they work best.
So this year… CRATE seats!
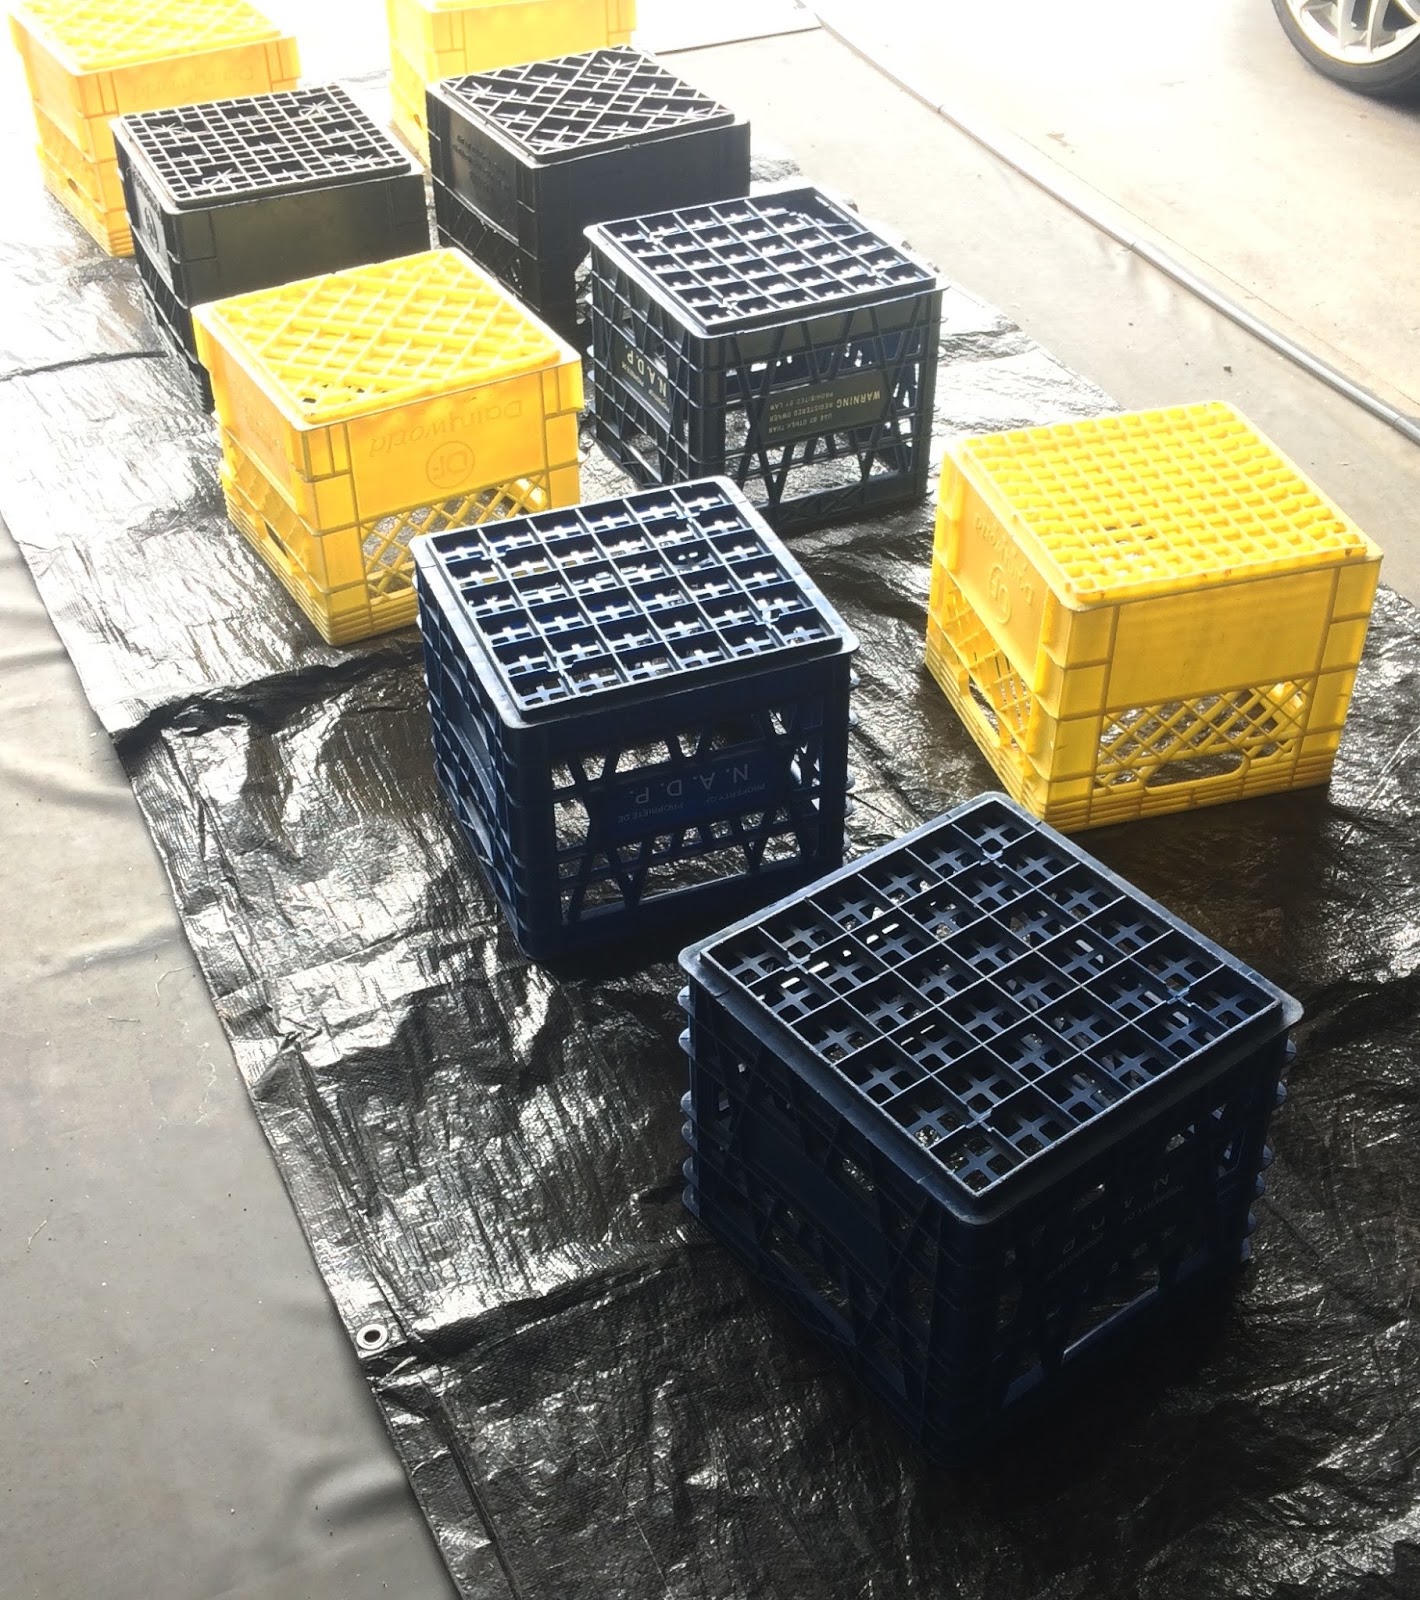
I haven’t done a big craft project in a long time, so I was pretty excited about this! I bought 9 milk crates for $5 each from a farmer on Kijiji. I could have bought crates at Home Depot for $6.95 each and I actually wish I had just done that instead, because the ones I bought I had to wash and paint, so it actually probably ended up costing me the same or more. Live and learn.
I washed them with our pressure washer (kind of fun!) and then spray painted most of them black. I ran out of spray paint more than once, so I have some I left yellow. Again, would have been easier to just buy black ones.
Next, I needed wood, foam, and fabric. The wood was the cheapest I could find. $13.99 for a 4x8' board of OSB from Home Depot. At my Home Depot, the first three cuts are free, so I got the nice fella to rip three long 14" pieces for me.
My hubby (with a me only really helping a tiny bit) cut all the rest of the wood for me. For each crate, I needed a 14x14" piece and a 12x12" piece. We actually cut the 12x12 ones just a little bit shorter than that, so they would fit inside the crate without me having to round the corners. My crates do not have an inside lip (some do), hence why the inside piece to hold the top in place.
For the foam and fabric, I hit my local Wal-Mart. The foam was a mattress cover, and cost me around $20. I bought two, because I wanted two layers for comfort and puffiness. The fabric was kids sheets, the Mainstays Kids Microfibre sheet sets. They had tons of different patterns, and were only $16.94 for a twin set. One set would have been plenty to make a dozen crate seats, but I wanted two different patterns.
I cut the foam into 14x14" pieces and 16x16" pieces. The smaller piece would be the same size as the wood top, and the larger piece would wrap around the edges. Then I laid one piece of fabric, then the smaller foam piece, followed by the larger foam, and then the wood top. I wanted to sandwich the smaller foam in between the second foam and the wood so it would be thicker in the middle without a line where the smaller foam would be. I put some glue in between each layer so it wouldn't slide around over time.
Then it was just a matter of stapling the fabric around onto the back of the wood. I started with the corners, and then the sides. It took some trial and error to get it looking decent, but even the first couple looked pretty good.
Next I centred the 12x12" wood piece over the first part, trapping the fabric ends in between, and screwed it on with 3/4" wood screws. I decided not to glue them together, thinking that if my fabric ever starts to wear out, tear, or get super dirty, I could remove the bottom wood, recover the top with fresh fabric and replace the bottom part. Thinking ahead!
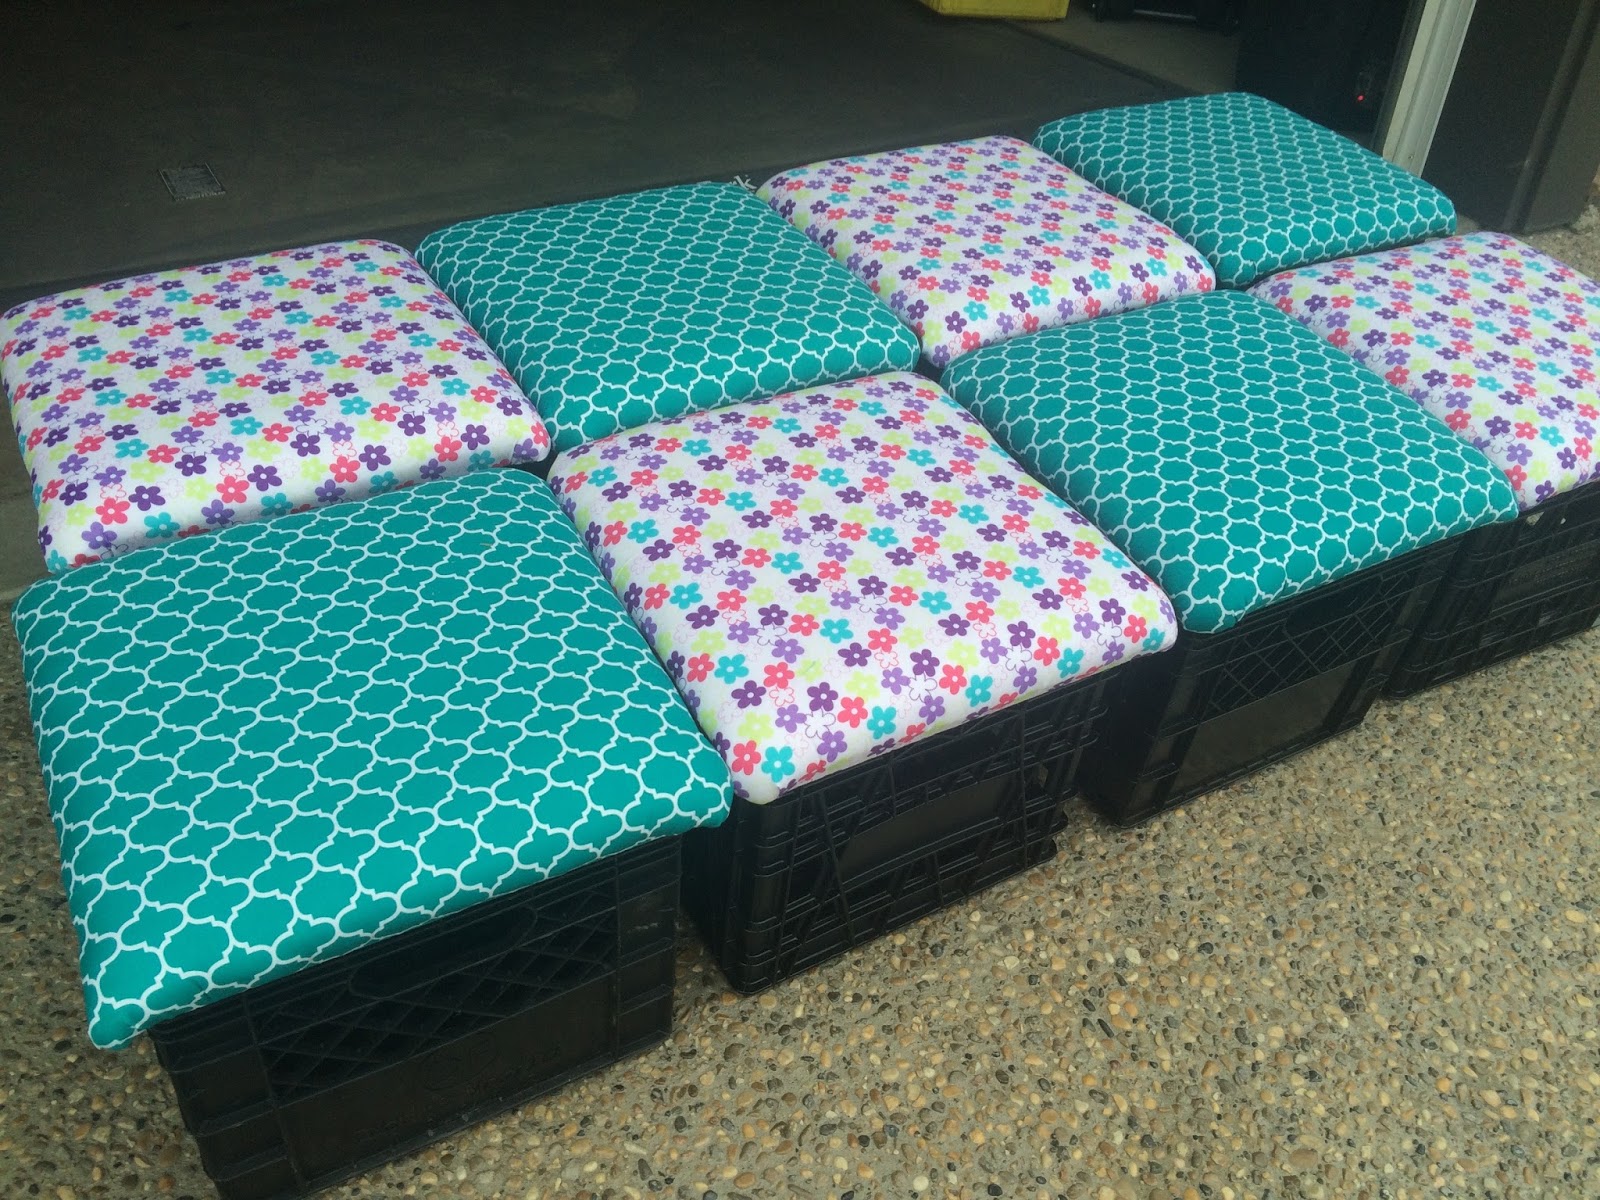
Place the finished top part onto a crate, and done!!! Beautiful crate seats, ready to be filled up with all my extra storage materials! The bonus to filling them is that it also makes them more stable, and I don't want my kids to move them all around the room. I will place them around the room where I want them, and they can pick one to sit on. I will be able to move them, but they will be too heavy for my Grade 2s. Perfect!
All loaded into my vehicle, ready to go to school tomorrow. I will post pics in my Classroom Reveal once I get them filled and placed around the room. So excited!
This is Part 3 of my Lesson plan on Student Blogging as Digital Portfolios. Part 1 walked you through the steps to set up a class blog and student blogs on Edublogs. Part 2 was the part of the lesson where the students wrote an autobiographical statement to use as their "About Me" page on their own blogs. And this, my friends, is the part where your students introduce themselves to the ONLINE WORLD!
My daughter Ayla helped demonstrate this section with me, so it is her blog we are creating here.
When my students log onto the computers at school, they are automatically directed to our division portal, which is where I provided them with a link to the Class Blog. You will have to provide a link for your students wherever is most convenient for them and your system. When they get there, they will be on the Home screen of your Class Blog. Mine looks like this:
My theme is the Edublogs theme Patchwork, but I changed the background image from a plain tan background, to the dark coffee beans. I wanted a darker background so that the boxes would stand out more, and I LOVE coffee! The background was a free one I downloaded from Pixabay, which is an excellent place to find high quality images of all kinds, that are free of copyrights under Creative Commons. It is vital that we teach our students about copyright rules early on, but that's a post for another day.
The first step is for all kids to click on their own blog with their name on it. I walk the kids through this by having a sample up on the Smartboard and pausing at each step to make sure all kids are on the same page. If they get lost at this point, it is hard for them to find where to go, and you will have a LOT of hands up! Next, show them the menu across the top, right under the picture. The menu lists all the pages on their blog site. At this point, it will have “Home” and “Sample Page”. Explain that on a blog site, there are Pages and Posts. Pages are for information we want people to be able to quickly get to any time. This info won’t change very much, like the About Me page we are creating today. We will click on Sample Page.
Once on the Sample Page, students will click the EDIT button to the right of the title, which will take them into the editing part of the site. Make sure all students are there before continuing. The first thing they will do is to change the words "Sample Page" to the words "About Me".
(Under that title is a permalink, which you will also want to change, but I suggest going around and doing that for the students, for simplicity. You will want to leave the rest of the permalink the same, just change the words sample-page to about-me.)
Next, the students type their autobiographical statement from the last part of the lesson into the big white space available!
*For students who struggle with typing, they could first record their writing in a Google Doc using the Read & Write speech-to-text extension, and then copy and paste their work into this blank space.
The following video is Ayla and I going through the process of typing her autobiographical statement onto her blog page.
When done, the students click the blue UPDATE button on the left side of the page, and VOILA! They are internet sensations! Well, maybe not yet... but soon!
As a closure for this lesson, I pull the Class blog up on the Smartboard so the kids can share their pages with each other. I email all the parents so they can check out their child's new page. This is only the beginning of a year of digital portfolios!
Part 1 of this lesson included instructions on how to set up a class blog and student blogs. If you haven't read that one yet, I would suggest doing that first! Click HERE for that post.
This is the first part of my writing lesson that will lead students to creating their About Me pages on their student blogs. You will notice that this lesson references a PowerPoint presentation quite often. I have included pictures of the slides where necessary, and links to the video showing the whole presentation. If you would like a copy of the actual PowerPoint slide presentation, please email me and I can send it directly to you.
INTRODUCTION (gathered in reading area)
To begin the introduction, gather the students in your reading area and read them the book Trombone Shorty by Troy Andrews. This is an autobiography about a boy in New Orleans who grows up to become a jazz legend. I chose this book because it is an age-appropriate example of an autobiography, and a good story! I found the book at my local library, but it is available on Amazon: Amazon.ca Amazon.com
There is also a video that gives an overview of the book with his beautiful music in the background.
Ask your students “Who is this story about?” “Who wrote this book?”. Explain that when the author of the book is telling about him/herself, that is called an Autobiography. Break down the word for them on poster paper:
oAuto means Self
oBio means Life
oGraphy means Account, writing, recording
See if they can come up with other examples of words that use those parts (like automobile, biology, choreography, etc.)
This is when I tell my students that we are going to be creating blogs as digital portfolios this year. This means that they will all get to record videos, audio, post pictures and writing to show all the things they are learning about in Grade 2! I want this to be exciting for them! Most of them will be familiar with "YouTubers" who are "famous", and that is a kind of video blogging!
In order to start a blog though, the reader needs to know WHO the blog is about. So, for their very first blog post, they will be writing an autobiographical statement. Or, more simply put, an "About Me" page!
So why do we need to teach about autobiographies if we are writing an online blog?! I take a few answers from students here, and maybe some with hit on the answer! A BLOG (web log) is like a digital autobiography! A BLOG can be an ongoing story that tells readers:
This lesson is designed to end with your students creating an "About Me" page on their student blogs. I want this page on their sites to be a good introduction to who they are, but I want them to understand that every type of writing has it's own style and intended audience. For all assignments, I go over the criteria for a successful _______ (in this case, the blank is filled in with About Me Page). Here is what the students are expected to include:
I use rubrics in my class, both for summative assessment, as well as for students to edit and evaluate their own (or a classmate's) work. For this lesson, I give them a copy of the rubric they will use, and we practice evaluating some examples I made up. See the video for the sample pieces!
First, as with most writing, we want to create an outline. For this lesson, I created a brainstorming sheet to outline the student's writing. This is an easy way for me to see who needs help coming up with what to write, and who can work independently. The pic below is my daughter Ayla, doing the project for me as a template for my students! She still loves school, so she hasn't asked me to pay her yet!
To make it easier for the students to organize their writing, I have them shade the parts that go in the introduction (Name, Age and Grade, Where I live, and Family) one colour, and the parts that go in the body (Activities, Favourites, When I grow up, Other facts) a second colour, and the last cloud (why I am writing a blog) a third colour. This makes it easy for them to keep it straight while they are writing. Ayla said "Oh! That makes it WAY easier! I think I'll do that from now on!" Excellent!
Once the kids are done their brainstorming clouds, it is time to write! I have a slide on the PowerPoint for each section of the writing, and we go through it step by step. Once they are better at writing, we wouldn't need to go this slowly for the whole class, but because this is early in the year, and follows a specific pattern, we go slow. Kids that are more advanced are free to get ahead of where we are, and I will help the kids who are finding it a challenge to keep up.
The next step is to EDIT! I start the editing process right from day 1 with kids' writing. I want them to be clear that editing is just as important, if not more important, as the writing itself! For this lesson, I have prepared and editing checklist that the students can work through independently, with a partner, or with me.
Once the autobiographies have been edited, and checked by me, we are ready for the FUN PART... Creating a page on the Student Blogs!
Kids and computers go together like peas and carrots! In the world they are growing up in, computers are everywhere. They don't know a world without Google or iPads or Smartphones. Whether you feel like that is a good or a bad thing, it is the reality. We as teachers need to embrace that world in our teaching, or risk being left behind. It's as simple as that.
The last few months I have been taking a course through Athabasca University called EDPY 480: Learning with Technology. It has been a lot of work, but amazingly valuable for me as an educator who strives to stay current and on top of Ed Tech. The course focuses on using technology to make learning more meaningful and authentic for students, which is a goal all teachers should be striving for! I don't ever want to hear my students ask: "Why do we have to learn this?"
I identified an area that my students struggle with, and chose Functional Writing. I wanted to design some lessons that would make this type of writing meaningful for my students, while teaching them to use technology that could be transferred to other activities. I teach a grade 2 class of around 20 students. Most students at our school would be familiar with technology such as computers, iPads or tablets, and may even have experience with social media. We have inclusive classrooms at our school, so students of all levels and abilities are together in the general classroom setting. Reading and writing are at varied levels at the beginning of the school year, with some students reading and writing well, and some very little. Using technology to read and write for a real purpose can help develop these important skills in my students.
ENTER DIGITAL PORTFOLIOS!
In her eBook Connected from the Start: Global Learning in the Primary Grades, Kathy Cassidy states that a “digital portfolio is richer in content, more comprehensive and much more revealing of the student's progress over time” (p. 64) than a paper portfolio. As soon as I began my research into creating student blogs, Kathy Cassidy's sites kept showing up on all the "Best of" lists! She is a Grade 1 teacher in Moose Jaw, Saskatchewan (right near my hometown!) and, quite frankly, she is amazing! She is an Apple Distinguished Educator, and has a hugely popular class blog, as well as her professional blog Primary Preoccupation and a group blog at Powerful Learning Practice. It was through her book that I developed my rationale for creating Digital Portfolios with my students this year! The world that my 7-year-olds will live in as adults is a hyper-connected one. Already my daughter feels like the dances she makes up aren't "real" unless they are on YouTube. Kids email their grandparents, not write letters. The internet puts all information right at their fingertips, if only they know how to find it! Learning how to be a part of the online world, in a responsible, safe, and interesting way, is an essential skill for this generation! As I was working on this blog post, I was listening to Ep 50 What are the Benefits of Student Blogging at TeachThought. It really helped solidify my own reasons for doing this! Students in this generation are going to have an online presence. That is simply inevitable. So doesn't it only make sense that we as teachers show them how to do it well? Lastly, back to my original learning problem, it is a type of Functional Writing that is likely the one they will use the most in their lives.
Another benefit of a class blog and digital portfolios is that parents can keep up to date on their child’s progress as well as what is going on in our classroom. Students have a record of how far they have come over the course of the year, and I can use it to assess their progress as well. Win win win!
Okay, so you are thinking... "This sounds cool, but how do I get started?"
First, I chose a blogging platform. I chose Edublogs because right away it seemed versatile and easy to use. Edublogs is powered by Wordpress, but is geared towards teachers and schools. This means that it has features that I was looking for in a class blog, such as ability to create a class list and student blogs tied to the main site, ability to monitor student activity as well as moderate comments. This is important, because I don't want to have to worry about inappropriate content on a class blog. I have had a class website on Weebly for years, so I am not entirely new to the process of creating a website. Creating one on Edublogs was super easy! Check out my video below for instructions.
Once that part is done, you are ready to start playing around with themes and widgets and other fun stuff! The best part is, if you don't want to spend a lot of time on it, your class blog could be almost ready to go AS IS!
The next step is to create a few pages on your class blog. The ones I have are:
Home (this is a default page on the menu)
About 2C
Contact us
Blogging Guidelines
How to Comment
I would definitely recommend having at least a Contact page, if nothing else. The rest is information for parents or other visitors, and also stuff I will be talking to the kids about as far as appropriate online identities and so on.
Here is where I describe how to create Pages, including a Contact form:
Lastly, I adjusted the settings a bit. At my school, having an online presence is still very new. We have social media, but last year was the first year it was well used. Parents are still a bit skittish about having their kids online, and understandable so. Last year 1/8 of my students were not permitted to even be photographed. So I want to ease our community of parents into it, with strict privacy settings. As they see how valuable the process of having an authentic audience for their children, and see how safe the student and class blogs really are, I am hoping the audience can be wider for my students. But for now, we will not be "blasting pics of the kids all over the inter-web" as one parent once said to me. :)
Watch this video to see the few changes to privacy settings I made, as well as how to create a student blog.
In my next post, I will be sharing my lesson plan on creating an Autobiographical statement for students to use on their About Me page on their Student Blogs!
Owen has been into Pokémon since he was old enough to play video games. He has always been a "collector" by nature, and Pokémon is basically just a virtual collection in it's most basic form. Of course there is a lot more to it, but I can't even pretend to understand any of it. What I DO know is that Pokémon GO has taken my son off the couch and out to walk, bike ride, explore, and play. If someone had told me a video game would do that for him, I would have scoffed! But it has! He and Ayla even logged 10.5kms in one day! What?!? So what exactly IS Pokémon GO, and why is it all I hear about lately? Why are there people on every street corner staring at their phones, and why are those pasty "haven't seen the sun in decades" types suddenly hiking the city streets? I looked it up, and got most of this information from LifeHacker, so for more detail, I suggest reading about it there. But here is my synopsis: Pokémon as a franchise is basically an alternate world where monsters of various types roam. A Pokémon Trainer (such as yourself) can find them, catch them, and train them. From there they can battle each other in "gyms" and become stronger. They also increase in CP (power), and can Evolve into other, better creatures. *I am well aware that my knowledge of Pokémon is extremely limited, no need to correct me, my son does that enough already. Pokémon Go is a free app for your phone (iPhone or Android) that you can simply download and start playing. There are in-app purchases, but I haven't looked into that at all, since I refuse to do so on principle. In the game, your phone's GPS is used to show you the real in an augmented reality. This means you see a real map of where you are, but things such as Pokémon, Pokéstops and Gyms are superimposed onto the maps. Clear as mud? When my kids started playing it, it all sounded like nonsense to me. ANDDD... then I downloaded it. It took no time at all to figure out (it is actually very similar to Geocaching if you have ever done that, except the "caches" are virtual creatures you get to keep and you don't have to leave anything in it's place). Now I, too, find myself checking my phone when I am out and about, just to see what's around. A trip to the library took me over an hour, because I walked all around the parking lot catching Pokémon and hitting Pokéstops! I only have 17 (and counting) Pokémon in my Pokédex so far, but I do get the appeal now!
Back to the kids.... Now that I understand it a bit more, I am even more on board with this game! Owen has even started taking pics of the Pokémon he finds, and trying to have creative and visually pleasing compositions. So not only is he getting fresh air and exercise, he is being creative too! Amazing. And free. Best of all? I can get my kids out for a day of fun, outdoor activity, with no complaining!
I like travel. No. I'm trying to make that true but what IS actually true is that I like the IDEA of travel. I like hearing about other people’s travel experiences and feeling envious of them for wanting to do that. Travel makes me anxious. The packing and the planning and not knowing what to expect…. Really not my jam. I try to compensate with lists. Packing lists, food lists, lists of possible activities, itineraries and backup itineraries, and then of course I need a list to keep track of all the lists. Flying makes me feel I should bring nothing and driving makes me feel like I should bring everything. Clearly, I take all the fun out of it. Once I am actually ON a trip, I often feel paralyzed with indecision about what to do there. I need to make it worthwhile to be out of my comfort zone. But how? So today, Owen, Ayla and I leave to a family reunion in a tiny town in the neighbouring (my hometown) province of Saskatchewan. It is a place where the sun is unyielding, the summer storms are fierce and majestic, and the mosquitoes laugh mockingly at your attempt at bug spray as they carry you away to their lair. I love my family and can't wait to see them, and once I am there I'm sure all will be well. It's the preparation that gets me. But… Cancelling is rarely an option with these things, so departure is D-3hrs and counting and I'd better get busy!
During the long dog-days of summer, it’s hard to figure out what to do with the kiddos. Mine are all in the pre-teen/teen stage of life, so mainly they can entertain themselves. The main issue is all the screen time! Left to their own devices (pun intended), they will sit glassy-eyed and still, staring at a screen most of the day. YouTube videos by the hour, all those ridiculous teen shows on TV, XBox and PS4 and DS and blah blah blah. So Dan and I laid down the law a few months ago and instituted “screen-free” time between the hours of 10am-3pm. Go DO something! There are parks and bike paths and friends to play with! But instead, most days, it is “Mom/Laura, what are we going to do today….” (read in a super whiney voice). I don’t want them to think I am there to constantly entertain them, but I also do want to find fun things to do around the city. Enter the BEST website for that purpose: It is called To Do Canada, and there are many major cities (including mine) on there to explore. It tells me what festivals are on, what activities are happening, or suggestions for family fun! It even has sections for adult fun, road trips, day trips, and so much more! It is perfect for me, because I am not good at planning events. I am totally on-board, if someone plans something, but I don’t like being the planner. This website is perfect!
I've had an “online presence” for a long time. I frequently post on different forums, I have a Facebook account (although I've never been that into it), I have Instagram and Twitter… But they are more pics and short text comments. Not quite right for this long-winded girl. I've had a website for my class for years, including a blog about class activities, which no one ever reads except my students and the occasional parent.
This year, I had a student who absolutely cracked me up! He was an awesome kid, and everything that came out of his mouth was hilarious. “You should write these stories down!” people would say when I would tell my daily tales about this student, and other goings-on in my classroom. I should, I thought, but didn't.
Then at the end of the school year, at a “start the staff meeting game” I casually told a group of my colleagues that “I Blog”. They were suitably impressed and asked where they could locate such glorious writings, and I had to backpedal a bit. I mean, I don't have my own ACTUAL blog… Just the one on my website… And an online journal on a fitness site… But.. Um…
Why don't I have a Blog?!? was the question that kept popping into my head. So as soon as summer hit (and I slept for a solid week), I set out to fix that problem.